 Hallo! If you've seen the other parts of this tutorial, you should be just dying to know, when to we get to the really cool bag? The other bags are reusing clothes as raw pieces of fabric, this is what one might call the "truth" bag. That is, everyone can tell exactly what it is, and it's very exciting for most people to see things being reused in creative ways. (I won't try to take credit for the creativity, people have been making pants bags for years!)
 For the top of the pants I like to do one or two small appliques. These were a smaller pair of pants so they won't make space for too much! Pant tops already have so much going on with pockets and such I often just put and old patch or two on and call it done. With dress pants you can pin the pockets up out of the way to avoid sewing through them, a pocket works poorly when you cut off the bottom half! Try to arrange your appliques so you can sew all the edges easily without pockets, the fly or other structural aspects getting in the way.
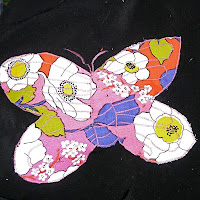
For the black I wanted to have a bunch of bright colors to stand out from the backdrop. Pink is also the overwhelming hue here.

 After all your appliques are sewn, flip the bag inside out and sew up the bottom. I suggest rounding or gusseting the corners. You will have to cut across the crotch to make it straight-ish, play with it. The pants are designing to fit our three-dimensional bodies so they don't just lay flay perfectly. Flip it back and measure it.
We're going to make a lining for this bag (though totally optional) because Pink likes pockets and she doesn't think it's at all to much to add pockets to a bag that naturally has four. ^.^
I always sew my linings in to the waist band, so I measure from the bottom of the waist band when cutting my lining. One could just as easily sew at the top. Be sure in your measurements you leave enough to fold over for a top hem and that you follow the fall of the pants. Pants are usually shaped like people and the lining should be too in order to fill up the bag. as with most sewing a little big is better then two small. Before joining the two sides of the lining I sew in pockets to both sides.
 I sometimes hem the lining with a decorative stitch just to make full use of my machine, it's a little thing that's fun to discover. After sewing up the sides of the lining and checking the fit I sew it in to the pants and tack the lower corners. If while sewing you discover you have more lining then pants you can just fold over little sections like ruffles on a skirt. The perfectionist will want to
  pull out the lining and make it smaller.
The final step will be to make the strap. One could add little straps for button closures but this bag was somewhat small so I didn't feel it was necessary. The strap is a sash in some psycedelic colors. It was fairly wide so cut it in half to use on two bags. This bag will be "messenger" style with one strap that stretches across it. That is the strap is sewn on the sides of the pants instead of front and back. Make several passes to ensure a sturdy long lived piece.
And there we are! Completion of all three bags usually takes my about 7-8 hours if I don't get distracted by button sorting. For more ideas on things to put on your bag browse flickr or another photo site. Grocery shopping should be a fun and colorful experience, and you bags should match your outfit. In fact one could have functional totes for all seasons and moods just to carry you daily sundries. I use these bags to take books to school, clothes to change, shopping sprees and sometimes just my lunch!
Happy Crafting!
No comments:
Post a Comment