
I get a fair bit of feedback from customers, lookers, and most importantly friends and family who have gotten my bags as gifts. My parents keep asking for a bag with a flat bottom for keeping lunch containers upright and stacking groceries. I'd been considering the problem, and then I received the solution, two pairs of pants which are much wider and shorter then average.
That is, after the legs are cut off (for tutorial on that and what to do with the top click
here) it is not suitable for making two bags.

After cutting off the legs I measure the bottom. I'm going to be cutting open the legs so I multiply by two and then cut the legs again at that length. Ex. these pants are 9in. across the bottom so I cut at about 17in.

Set aside the bottoms and take the top strips, you see why this is a good project for stout pants? Dividing the legs in two would make two very short wide totes, not so useful.
Cut open then fold over the strips, and use a straight-edge to make it rectangular, and cut in half the hot dog way.

These strips needn't be perfect rectangles, but lot's of twist and turns will make a blobby bag.
Cut the leg bottoms up the middle to make squarish pieces. Measure the sides and the edge that
will be the bottom of the bag. (I let the natural hem of the pants be the hem of the bag). Add up these sides, that's the total length of strips you will need, and give yourself some wiggle room, add a few more inches. Sew the strips together and set aside.

Take one of your large square leg pieces and decorate as you please.

After appliquing your little heart out, grab the long strip. Fold over one edge and hem. Line up the top edge with an edge of the bag and start sewing. Be sure to backstitch of zig-zag to secure the top, as that part gets lots of stress.

When you get to the corner just bend your strip to make a rounded curve, and continue on the next edge. When
When you're at the far edge secure appropriately, it will look like this, with one end of the strip hanging over with extra.

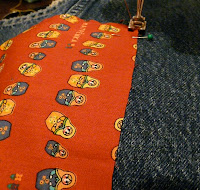
Prepare the other square by sewing on pockets. Yes, I suppose you could make a bag without pockets, but why? I like to make two pockets, one slightly smaller then the other. Then sew the inner pocket on first so that the outer pocket covers the stitches.

Sew the strip onto this square in the same manner as the first, starting with the hemmed edge. Check as you go to make sure the corners of the faces are in about the same spot on the strip. That is, make sure the two big pieces line up. When you get to the end you should have a little hang over, cut it to size and hem it up.

Now just add handles! Sometimes there is enough extra pant to make handles from the denim, but I only had enough from these pants for a button strap to go across the top. These handles are seatbelt webbing, the pick-n-pull auto parts is a good cheap source for seatbelts. Pro-tip : Don't use your good sewing scissors on these, tin snips or heavy duty garden shears are a much better choice!
Next put on a skirt, go out on your balcony in February weather and hope your goosebumps don't show.
To see more pics of the finished product, check out the
Etsy listing.

 My Boyfriend is such a winner, he even bought me a knitting pattern book. Since when do they sell such things at King Soopers? Could it be he actually want to a bookstore too? Such a keeper...


 Luck would have we arrived on a day with a flea market in full swing. People had pulled up cars and set up tents, some had vintage (post-war) everyday stuff, newer used clothes, vintage kimonos, antiques, and somewhat historical debris (sword pommels and statues).
  I picked up an awesome vintage Kimono and Obi for only 25$. There's a slight bias against wearing used kimono,


 We however went to the shrine on the 2nd, it's appearently less crowded then the first. We still stood in a line around the block, and the police were leading us up the stairs to the shrine. This is the most importent time to visit the shrine and ask for luck in the coming year, so not many miss out on it.
 Up top was a particularily fancy New Year's charm (for lack of a better word). For about a week people have been buying these decorative pieces made of twisted straw, pine branches, oranges and other assorted plant materials and decorative paper. They hang them on the doors and gates of homes and bussinesses, and on the 14th bring them to the shrine and make a donation. Then they make a bonfire out of the whole pile. I love religions that involve making noise and burning stuff.
 After coming down from the shrine we wade through a street of vendors selling traditional yummies. It is almost required that people buy a box of sweet mochi treats. Mochi is considered lucky to eat for new years, so it is featured in every meal for about a week. Unfortuneately they were not making mochi at that shrine, but it is quite an immpressive show.