Imbolc (also known as Imbolg, Candlemas, St. Brigit's Day etc.) is a traditional time to celebrate the winter's passing and look forward to spring. Stories say that Imbolc was when livestock began to give milk again, heralding the birthing season. This milk helped families that were running low on food to survive the winter. The name Candlemas may mark this as the time of year when the sun rose early enough that one no longer needed candles to do early and late chores.
Tradition dictates that one makes a new Brigid's cross each Imbolc, and burns the previous year's. (It's also time to burn other Yuletide greenery, goodbye tree!) Brigid's blessings are beseeched, and the cross offers her protection thru the year. Here you see last year's cross hanging above the doorway, it's made from iris leaves as that is what I found in the garden last winter. Next to it is a
reed cross I made on my pilgrimage to Ireland last fall. Lesson one - You will never regret adding more rounds!
This year my garden is covered in a wonderful blanket of snow, so I was forced to seek out some more traditional supplies. Wheat and dried (and dyed) reeds were found in the floral section of a big box craft store. They were rather expensive, and I will try to remember next fall to squirrel away some sheaves! I did soak the materials overnight to soften them up, the reeds never really got flexible, but the wheat was very pliable.
I also spun up some Irish wool to use for tying. Really, any twine, string etc. will do.
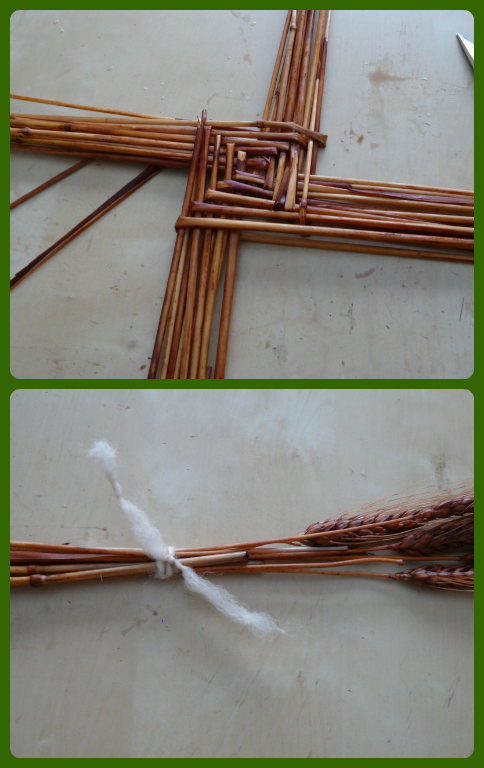
Start by learning a square four-armed cross. This style reminds me of a sun-wheel!
1. lay out a stalk upright, slide another stalk underneath.
2. fold it over to the right.
3. rotate the entire thing clockwise, lay out another stalk, sliding it below the first. Fold it in half to the right.
4. Rotate the entire thing clockwise, slide a stalk under the upright, closer to your body than the center, fold it in half to the right.
Repeat until you have a large core. remember to keep rotating the same direction, always adding on the side nearest you, always fold to the right. After a few rounds the center will be easy to see, and you will notice problems easily. Tie each arm up, be sure to wrap a few times around and pull tight! As the cross dries it will shrink. You can now easily tidy up and tighten the cross.
To make a three-armed cross, follow the directions above, but when you get to adding the fourth stalk, bend the first stalk (upright in the first photo) around to the side to make three evenly spaced arms. It's a little trickier to start, but after a round or two it gets to be just as easy as a four-armed.
Now ask for Brigid's blessings, light a candle for her, and hand them up around your house! I hope you all are staying warm in these lovely winter storms!


1 comment:
Beautiful!
Post a Comment