Showing posts with label wheel. Show all posts

Friday, June 26, 2015

Embroidered Offering - Balance

The wheel of the year keeps turning, so that all thing remain in balance! I recently took an Oath in my spiritual path, and promised an offering. My oath was very much based on the theme of balance, so I thought my offering ought to be too!

It was a smallish piece, just one hoop's worth of stitching. I started out by divvying up the linen into quarters. I've learned that pencil lines wear off rather quickly, so I used regular sewing thread to baste in marker lines.


I did trees for the four seasons. (This is a favorite of mine!) complete with an appropriate amount of foliage - from little buds to nothing! 

 Next, faces! I had never done faces in stitchery before, if is a very interesting challenge. I have a masculine and feminine face, and I tried to make one old and one young. (They both look a bit old, hazards of hard shadows.) I'm fairly happy with how they turned out, but most importantly, the camera thought it was a person!

The final touches were some weather. Sunshine for the spring and summer, rain and snow for the fall and winter. All the things in their own time. Everything in balance.
We had a good bonfire for midsummer, and offerings were made. Welcome to the warm times! But, the days are now getting shorter, good news to keep us from getting too hot. Also good news for us travelers - I'm writing this in Iceland, the sun only set for about 3 hours last night, and it never got dark. I'm loving it in many ways, but sleep is also good! Here's to Balance!


Thursday, January 1, 2015

Turning Red

I'm preparing to do a teardown and rebuild of my spinning wheel this season. She put in a whole lot of hours for spinzilla, she deserves some pampering. In addition to the wood spa action, I was considering spiffying up the old girl. I intend to stain it a new color, and add some wood burning.

 First, is the making of the stain. (Of course I'm making it, that's how I roll.) I used alkanet as the dye stuff, alkanet it a root with a rich crimson color, but the dye particles are only soluble in oil or alcohol. Traditionally it has been used to dye wines a darker red,  color wood, and in cosmetics. So, basically for making stuff look like other stuff (buyer beware!).

I added the dried root to olive oil, and heated it in hot water. It sat overnight and then I strained it. The gentle heat helped the herb infuse without breaking down the oil. I then added beeswax, broken up and grated. Can I just say that grating wax is the smartest thing I ever saw in a Pinterest post...
After the mix cooled, it became a very soft paste. I found an object to test on - an old spoon that has never satisfactorily seasoned. I gave it a light sanding since it was already lacking in a good finish, and polished it with generous blobs of the oil/wax mixture. 


As you can see, the results were less than mindblowing. The polish has brought out the grain, and given the spoon a much needed protective layer. But it's not really all that red...

I did some more reading, and will try adding the rest of the alkanet, ground to a powder, to infuse into the polish. See, not even a Craft Bitch gets it right the first time!

Tuesday, November 4, 2014

Schacht - Can You Dig It?

A few weeks back I took part in a marathon crafting extravaganza known as Spinzilla. We spun for seven days straight, and Team Fancy Tiger created a total of 171,492.6 yards of yarn, that's 97 miles in case you're wondering. That's the distance from Denver to Vail, New York City to Philadelphia, and (so my military historian partner tells me) the range of large artillery.

On the last day of the challenge Schacht, a local spinning and weaving equipment company, sponsored a spin-in and the Denver Art Museum. Between the camaraderie and the shit-talking we struck up conversation with some of the folks from the factory, and they invited us to come have a tour!
Dipping the wood pieces in an oil finish.


Racks of wheels ready to be assembled.

Does this count as a wheelwright? 


Machines neatly cut out flat pieces with very little waste. Some parts are cut from plywood, some from hard-wood planks.
Everything is very carefully sanded to make smooth tools.


The factory is always open for tours, just call ahead first! If you're a fiber artist, and you're in the Boulder CO area,  it's a fascinating experience. Even for the non-spinning-inclined the smell of sawdust and danish oil can't be beat. I personally love seeing how things are made, and many of these skilled workers are a joy to watch at work. Have any of you ever been to a factory?

Tuesday, June 25, 2013

Works in Progress

 As summer gets into full swing the craft projects are moving along. First there's my second Wheel of the Year embroidery. I have all eight plants laid out, and I'm preparing to add words and the finishing touches.

I finally took the step that I should have done first. Seriously, before everything else. Lesson learned. I kept making marks to outline the work area, and they kept rubbing off while I worked. So I took some sewing thread and basted down a circle that will be easy to remove when I'm done. Doing this made me realize that I was a bit off center, so now I'll be adding more to some of the plants so they extend to the edge. *Sigh*

If I don't start my next project by putting in guide lines someone please shoot me.

 I of course also made a smaller offering piece. This was a bouquet of all the flowers in the wall hanging, scaled down. I finished just in time to run off to the ritual, and didn't get a picture first. That's a strange sinking feeling that must not have plagued our ancestors "Well, it's burning now. No chance to take a photo I guess."

My less flammable project is a granny square blanket. I've used an entire bin of hand-dyed yarns in assorted (read - not matching at all) colors. Each square is a unique mix of colors, and I used nearly every scrap of most of the colors too! I'll be finding a suitable yarn to pull the whole thing together (probably gray, the only thing that might not clash with all these bright colors.)

I'm going to trim each square and sew them together, which should give me a 60" x 30" blanket, perfect for a baby gift.

What are you working on? Let the stash bust continue!

Tuesday, April 9, 2013

Flowers in the Snow

 Today dawned cold and snowy, a far cry from yesterday's 60F. Perfect day for stitching! I've gotten behind in my seasonal needlework, so I'm still working on Imbolc's heather. But that's OK, it looks like Imbolc outside...
 I'm still working around the wheel, those big white blooms are chamomile for Yule, next will be roses for Eoster (which was cold and snowy too!) Still debating whether to make the roses red or yellow... hard choices right?
What sort of stitching do you do when you're "snowed in"? And yes, those are flowers on the table runner, it's that time of year yaknow?

Wednesday, November 7, 2012

Flowers Everywhere!

 I know, it's not the season we would usually think of for flowers. Everything is all dead and dormant right now (let's pretend it's not been in the upper 60s all week and the spring bulbs are not trying to come up...) and it's not really the time for lush bouquets.

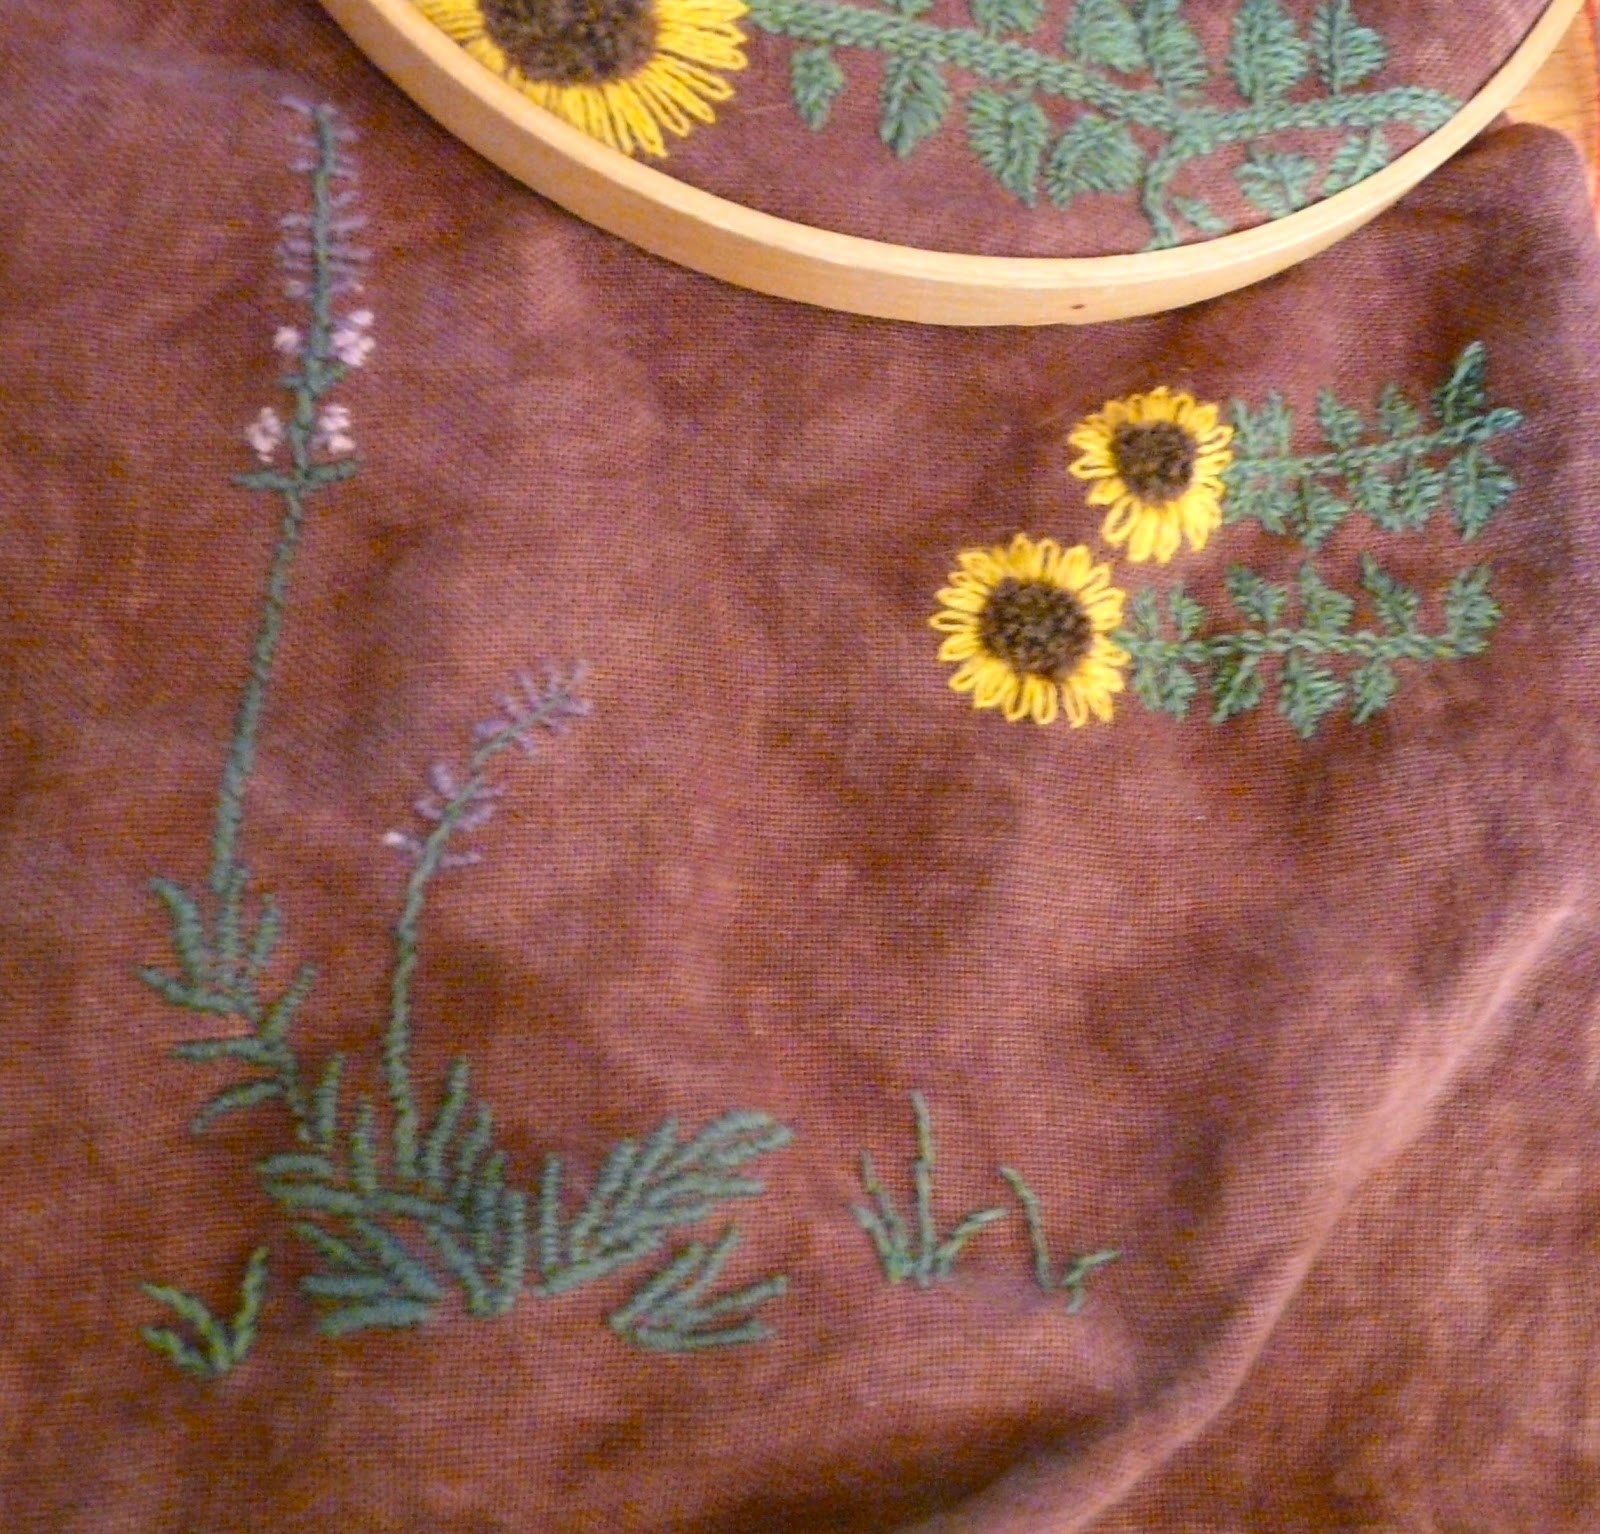
Fortunately there is never really a time without flowers, nature keeps that ball rolling 365! I'm also working on a new "Wheel of the Year" project, this one is themed with flowers instead of trees. I started with Lavender for Midsummer, and Sunflowers for Lughnassahd. I'm now working on Marigolds for Mabon.
It's been an adventure deciding how to portray specific species, and finding suitable accurate colors for each plant. I'm behind in starting on Samhain's Nightshade plant, but hoping to catch up soon. I also had a small epiphany that should be helpful, I find myself constantly redrawing the layout boundaries on the ground, it's dark and the white of chalk pencils seems to disappear quickly. I'm going to try bating a thread along the lines to delineate the space for each one, hopefully it will stay longer!

What are you crafting for the fall season?

Wednesday, June 20, 2012

Merry Solstice!

 Today those of us on the north side of the planet celebrate the longest day of the year and look forwards to the slow waning of the sun's light. This is a time of fruition and fertility (in ideas as well as fields and beds.) and a time to work on projects. I'm celebrating by burning pretty things...
   "What! Burning what kinds of.... oh no." That's right, after finishing my Wheel of the Year embroidery I started on a smaller wheel, this four seasons tree of life was made entirely to be offered up as sacrifice. "Sacrifice" doesn't just mean killing the fatted cow, it means "to make sacred" so anything that is offered before a deity is a sacrifice. In the traditions of northern Europe a sacrifice would be ritually destroyed to ensure it could not be used by anyone and was truly a gift. Clay and metal items were dropped in lakes, wood offerings were burnt.
   "But you're not going to destroy all that hard work..." Yes. Yes I am. It's a piece of art for the Gods of old, and it was made with this purpose in mind. I admit, I'm giving it to someone else for the actual destruction, it would be a wee hard to do myself.
And I don't have time to dwell on last years piece, the wheel spins along. I picked up some lovely maroon linen and a variety of colors for this year's project. I've chosen flowers to represent each of the eight high days and the seasonal changes. Tomorrow I start embroidering Lavender for the midsummer. Here's to another year! I hope everyone has a blessed solstice!

Saturday, June 2, 2012

Wheel of The Year

I started this project less than a year ago, and followed thru all the seasons, summer, fall, winter and spring. It is finally completed, with spreading trees and bright red letters for the high days.

Spring
Winter
Autumn
Summer

So then we are faced with the task of hanging this piece. I was hoping to place it directly on a piece of wood, but I couldn't find solid woods in a close enough size, only plywood. So I bought some square dowels and started cutting!
I used my "high-tech" staple gun to make a row of connectors at each joint. It was a little wiggly but sturdy enough for stretching fabric. The fabric actually stabilized it quite a bit.


I washed the cloth gently, and hung it to dry. Then I ironed it to as flat as a piece of lumpy embroidery can be. I taped everything in place at first to center it.


Now the great challenge, which side goes up? Also, how do I get those last few pencil marks off the linen ground? It was a very fulfilling project, and really did help me to be more in touch with the changing seasons. I'm already plotting a new project, to be started this midsummer. I'm thinking about doing herbs that are sacred to each high day, giving me a chance to learn more herbcraft too! This may become a yearly ritual for me, who knows how long it will last...