Showing posts with label house. Show all posts

Monday, January 5, 2015

New Curtains!

 Do you have an hour? A Yard or more of cute fabric? Make yourself some curtains, they will change your life room.

Before - Old scratchy lace curtains. Once they were white, but a layer of dust and food particulates has made them more "off-white". These are so boring I often forget I have curtains, only noticing when it's cold out and I want to cover the windows.

After - Holy shit, look at how cute that fabric is. I could have made a dress from it and ended up looking like Ms. Frizzle teaching food preservation. But for simply displaying an awesome print in all its glory, housewares are a sure bet.

Beehives overlooking the mead stash? Yes please! These curtains also offer a bit of shielding, like actually blocking one's view and darkening the room. Thus waaaay more useful than the fruu-fruu lace business.
  Each one took well under an hour, a bit more than a yard of the fabric, and the same cut of muslin. I ripped all my fabrics for square pieces. The three windows were slightly different dimensions, but I used the width of the fabric (44") as the horizontal measure. A little extra makes for some bunching and curling, not to mention good coverage. I ripped both fabrics straight down the center to split them.
 I measured the existing curtains, and the thickness of the rods. The lace curtains have a trim above the rod, about the same width as the rod space, which gives them a nice ruffle.

I marked double the rod thickness, and sewed the sides and bottom.  Line up the selvedge edges, it's easy to see thru the muslin and stitch right at the end of the print.

The last 2.5" of each fabric are rolled and stitched, this will be the rod holes. (Insert sex joke here.) Then the top is stitched, right sides together. The whole shebang is turned through either of the holes, just like a pillow or stuffy.
After turning, I top stitched the sides and bottom, stopping and starting at my rod holes. Two rows of stitching made across the top sandwich the rod and leave a little ruffle on top.

Out with the ineffective, boring, old curtains; In with some cute, colorful, functional pieces! Even my kitchen fairy seems to approve...

Such a small change, but it's impacted the kitchen in a big way! Much faster than a new coat of paint, but it's almost as big of an impact. I may end up with some spares to switch out, I do have enough fabric stashed away after all...

Go make stuff that brightens your life!

Thursday, February 20, 2014

Firestarters How-to

 It's winter, but at our house that does NOT mean that we aren't hanging outside! It does mean that our supplies of dry tinder are dwindling, and fire starting is getting trickier. (I rarely have piles of waste paper around, first world Druid problems.)

I do, however, have a box of old candle stubs and half empty tea-lights. ( Double boiler of course, with an old pan you aren't fond of.)

I also have a box of dryer lint, saved for just such an occasion. Some notes on that - the suitability of dryer lint for burning is dependent on the fiber content. Wool does not burn well, synthetics smoulder and melt. Fortunately, most American wardrobes have a high percentage of cotton, which makes rather flammable lint. To test your lint, pinch off a bit and try lighting it ( don't hold it in your fingers directly!) If you get a smouldering melting mass, it will not serve as good firestarters. To be clear, even a "pure" cotton lint will not burn clean and bright, as it likely has lots of dyes, dirt and foreign bits in it, but it will burn fine when covered in wax.
 I created a "mold" with a waxy advertisement paper, and filled it with a layer of lint. It's not terribly tall, it's easier to work with relatively narrow strips of firestarter.
 Wax is poured over, and a stick was used to ensure that all the fiber was covered in wax. When the block had cooled enough to solidify, but was still warm and pliable, I used a knife to divvy it up into blocks.
It takes a moment with a lighter to get each block going, but it then burns like a candle covered in wicks, and will light even damp or stubborn fuel!
Happy Bonfires!

Thursday, July 18, 2013

Painting Again

 It's time now to finish up the house painting project, or at least one more room of it. I'll have a new roommate next month, and an exchange student. I wanted to get all the guest rooms taken care of before anyone shows up!

 First came all the prep work. As I have painted this house it has become very clear to me that many people skip this step. There is carpet fuzz stuck to the trim, and switch plates painted to the walls. I took a razor scraper and removed all the funky stuff on the trim. I also patched the big holes in the walls that we used to bolt up bookshelves. Some were really really big *guilty look*.


We then painted the trim white. For some reason simply painting the trim a different color than the walls makes any room look twice as good...

Look at that fabulous green! I wanted light enough to be a bright room, but not pastel at all, and Mr. Crafty vetoed lime green.


My partner in crime (future roommate) did the roller-ing, while I took the green up to the ceiling and flush with the trim. The green glow from the walls mixes nicely with the yellow glow from the sun.

It'll need another coat of roller-ing to get an even color, but I'm already in love with it! This is going to be our young spainiard's room, so I get to do a little bit of decorating for it! I'm on the lookout for some nice lush landscapes and rich red sunsets to hang!
Have you tried a major color change in your house? What color would your dream room be?

Tuesday, June 18, 2013

How a Crafting Table Changed My...

 Craft room. And my life. But mostly my Craft Room.
 I built a craft table with an Ikea table top and two extending legs, and a thrift store bookshelf. The shelf is 40" tall, nice and high for cutting without stooping.
 First, I needed to tackle the piles in the middle of the room, crates full of scraps and bags of donated clothes. And a table top tapestry loom (I know, I know, people give me this stuff!)
 Here's the table in place, my steamer trunk fits neatly below, with room for crates above it. I stacked all my folded fabrics on an old book shelf, next to my craft books and boxes of notions.
 The bags of scraps went into the table-side shelves, those that fit at least. The clothes were all neatly folded and stacked and sorted and ohmifreakingawd look at how neat this became. I even swept the floor!

 Notice how I kept my back to the one unsorted wall? The wall with a floor loom hidden under boxes and piles of craft supplies? This is how I preserve my sanity. I will now always walk through with my back to the loom wall... yes, that's how we deal with that.

What does your craft space look like?


Friday, January 11, 2013

Wool Moths, Stash Busting.

 Two great tastes that go great together...?
Photo - http://www.bugclinic.com/clothes_moths.htm

I'd rather not ponder the way that wool moths taste, but being a wool lover teaches you entirely too much about their life cycle. Not to mention quite a bit about their taste (I swear, it's always the expensive stuff!) I've had moth problems around the house for a bit now, the biggest issue being my messy tendencies and the random dirty wool sock hiding behind furniture etc. I've been working to control them, and recently cleaned and organized the craft closet as part of the drive. Here's what I've learned.

1.) Keep it clean.
Wool moths aren't actually after the fiber, they are interested in eating sweat, skin particles and dirt off the wool. The fiber is just collateral damage. Be sure you wash sweaters, hand-knits, yarn and fibers before storing. If you're worried about the cost of cleaning all your woolens, the standard washing machine always has a dedicates cycle, run it with cold water and lay-out or hang items to dry. Hanging can stretch knits so I try to lay floppy pieces on a towel. There are a few sweaters I dry clean, but most of my wool collection gets it's own laundry cycle.

2.) Confuse 'em
 Many people recommend ceder, lavender, and cloves to "repel" moths. This items don't really stop a determined moth, they make it hard for moths to smell the dirty bits they are trying to eat. If your goods are clean and your stinky product fresh it will be hard for a female moth to find a good spot to lay eggs.

3.) Make it hard to get to.
The easiest way to prevent moths is to limit their access. Sealing bags and bins are a huge help. You must however beware of closing in the infestation, if a moth is happy to reproduce on your favorite sweater it won't even try to migrate. This leads to the next tip...

4.) Don't let woolens go dormant.
The more often you are disturbing the woolens the more likely you will find an infestation early. I also have squished many an adult and larva that was preparing to cause havoc. Don't let that bag in the back corner go untouched for too long.

5.) Freeze the Bastards.
After infestation starts the only thing to do is use physics. It's been cold enough here for me to use the back porch as an auxiliary freezer, so I've been cycling all my bins of yarn and bags of fleece in and out. Freezing does not kill the eggs, so you need to get a good deep freeze, then a thaw, then another freeze to kill newly hatched larva. With a freezer the standard plan is 1-2 weeks in, 1-2 weeks out, repeat as necessary.
I discovered a lovely black alpaca fleece (gifted by my awesome man, *SOB*) was heavily infested. I tossed it on the back porch and began going thru my entire stash. I found many things that were untouched, many slightly damaged, and a few totally ruined. I tied and rewound skeins that were damaged so they will be ready to use, and made plans for a whole lot of stuff! I plied a few of the damaged yarns for ease of use as well. This event has forced me to create a long stash-busting list of what I have and what I'm planning to do with it!


I've been installing moth traps as well, but they are only a part of a larger pest-management plan. They killed many males who were flitting around the closet, but in the infested fleece there was a self-sustaining colony. Those Bastards. I hope that none of you have to experience a craft panic like this, what steps do you take to protect precious yarns?

Sunday, December 30, 2012

I'm Excited About Napkins - Shoot Me Now

At some point tonight I had a terrible realization - I'm an adult. Not just any adult, I'm an adult who owns napkins that require ironing. *Shudder* To be fair, I'm the only one to blame for this early onset lameness, I made the damnned things. They are lovely! But they require ironing, like with steam and everything. I often have pleated skirts dry cleaned to avoid having to iron them. But I guess I'll have to buck up and embrace my stuffy adult-ness, I guess that can go on my list for the new year.

These are embroidered tea towels, dyed with onion skins to make them subtly pink. I documented the process in this post last year, made with green thread and tea-dyed. So now there's eight iron-needing napkins in my house. Fabulous.

If anyone needs me I'll be in the kitchen drinking metamucil and changing my hearing aide batteries...

Wednesday, December 26, 2012

Chair Re-fab

The number one way to get that vintage distressed look? Buy some beat-up chairs from estate sales, store them in your garage for a decade while you plan to do something. Find them while cleaning up, throw away the wonkiest one, then place them on a back porch in the sun thru a few snow storms.

No seriously, that's what happened. This were in my parent's garage until a major cleaning a few months ago. My father cursed under his breath and asked if I needed any chairs. They are, strangely enough, almost a matching trio. At first glance identical, then you notice the slight variations in shape on the back piece. Each seat is leather, of a slightly different shade and thickness.
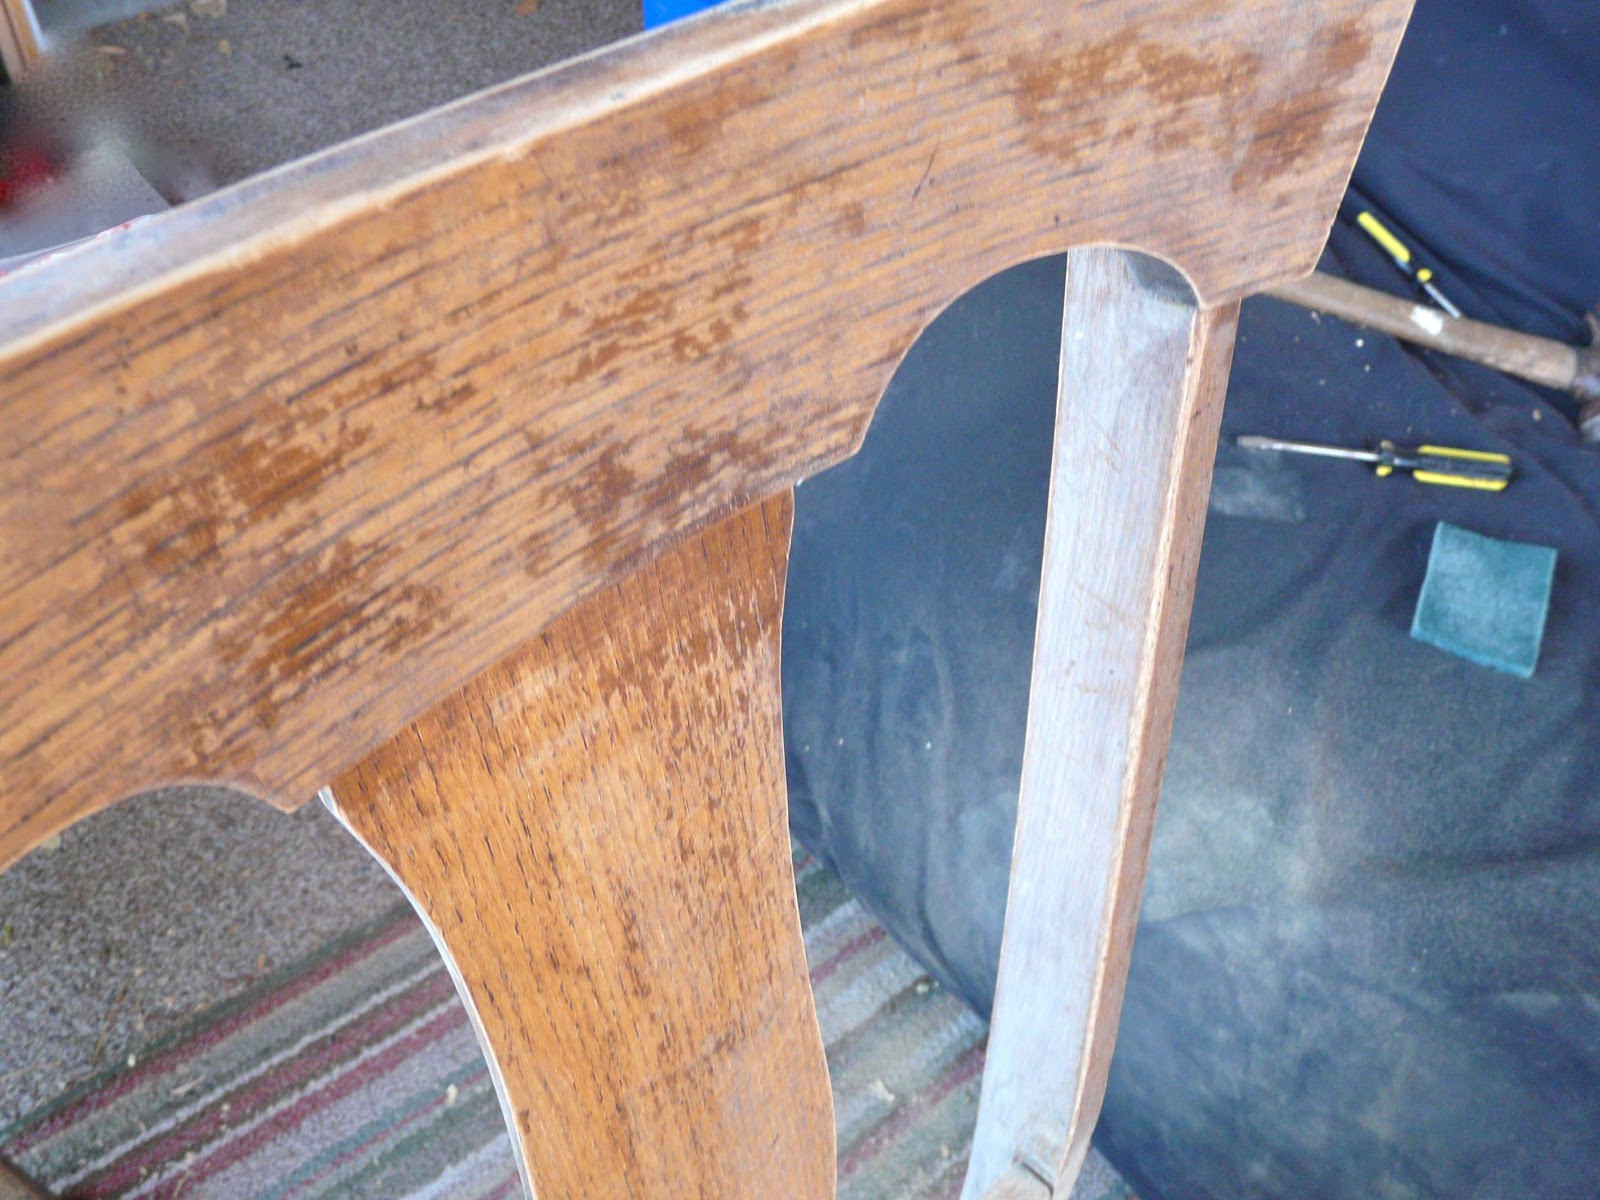
I first took off the seat, taped the screw to the bottom, and attacked with sandpaper. Not pictured is Miss Pink the Bandito... I wore a damp bandana around the face to protect from inhaling decades old shellac.
When stripped the natural color of the wood appeared, with a gentle grain and a smooth surface.


Then I attacked the seats, the leather was cracking and dry, and held on with rows of petite upholstery nails. The stuffing was an odd mix of dirty cotton fluff and shredded wood.

I bought seat foams (in sets of two naturally, I will have to find a fourth for my collection!) and used a vintage mid-weight canvas from my collection. Notice the screws taped to the bottom? If you're like me and you don't always finish projects in one day, then that little detail is imperative.
The edges were stapled down tautly. I first stapled one spot on each side to keep it square, then worked all the way around.
The bottom edge of the chair hides the fabric edging, and if not for the "holy-shit-no-commercial-joint-would-ever-make-this" fabric, one might call it professional. The wood is currently lightly oiled but not stained, I might decide to color it up a bit in the future.
Looks dashing with my new walls ya? Now to ditch these ugly tan curtains...

Have you ever done a furniture project? It's easier than you think!